Clandestine Mission..

September 15th, 2009
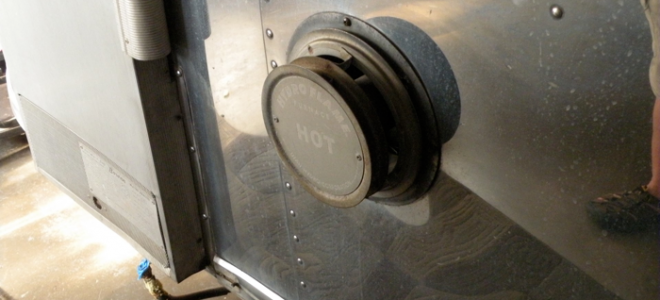
We were sort of toying with the idea of using the original outside covers for water heater and/or furnace vents. As it happened, both pieces could be re-used, preserving the original vibe of this 1965 Caravel. Using new vents and covers might have been easier, but the outcome in this case was well worth the effort.

Before…with outer water heater cover removed already..

Before: old water heater tank with compromised plumbing. A number of hose clamps and vinyl hose had been added over the year to repair leaks and other problems.

A frame was constructed to give the wall enough support to hold the water heater cover and lend structure to mount the water heater to the space between the skins.

The skins connected with sturdy new channel, entirely surrounding the water heater opening.

After: the new water heater in place, ready to be bolted in. It mounts perfectly flush with the outer skin. Now we can install the vintage frame, and then the outer cover. A slight modification to the exhaust side of the heater must be made to make sure the hot gas escapes through the old cover.

After: no one’s the wiser…there is a brand new water heater under there, complete with DSI ignition and new plumbing.
The furnace needed a bit of positioning trial and error, to line up with the existing vent hole and cover that was used for the old Hydro Flame furnace.

Lining up the new furnace within the confines of the former compartment, plus making the exhaust line up with the old cover wasn’t a small feat, but ended up working out quite well.

The rectangular tube is for combustion air intake from the outside of the trailer. Keeps the oxygen inside the trailer available for occupants instead of combustion. The small round pipe is expelling the exhaust back into the atmosphere.
We made an inner cover that seals the rectangular opening from he inside, and feeding the round tube back into the vintage furnace vent.
We made an inner cover that seals the rectangular opening from he inside, and feeding the round tube back into the vintage furnace vent.

After: a new furnace behind a vintage furnace vent in it’s original position.

The inside looks something like this….the new cover door is not installed yet. Due to the small size of the interior, we chose a direct discharge furnace. We think that it’s tan louver cover will go nicely in this mostly original interior, without disturbing the vintage theme much at all.
Next: finishing the LP lines and plumbing, adding covers and fine tuning everything.
After that: Electrical updates and fixes. Stay tuned. More to come very soon.
Today’s temps: high 70’s
Today’s tunes: silence…forgot my ipod, not in the mood for network radio….

